
 Home
Home Forum
Forum  Reports
 BDC
BDC ABAP Objects
 Creating table in SAP Step by step process
Page 1 of 1

Creating table in SAP Step by step process
![]() Admin Sat Mar 24, 2012 1:04 pm
Admin Sat Mar 24, 2012 1:04 pm
Execute/open the transaction SE11.
Select the radio button Database table and Provide the table name as shown below starting with 'Y' or 'Z'.
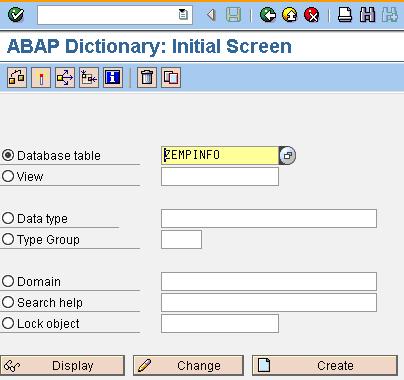
Click on Create button and provide the following details.
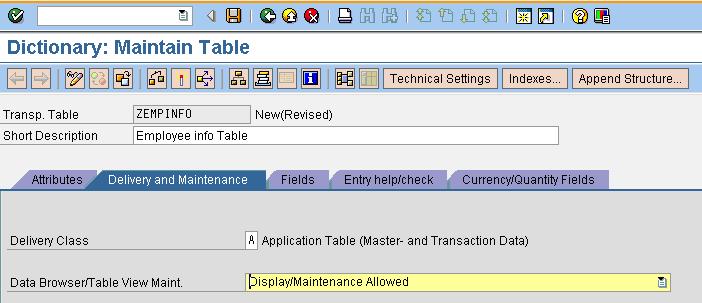
Provide the table fields as shown below. You can create the table with the pre-defined data types or you can use data elements provided by SAP. You can switch between Predefined/data elements using the button "predefined/ data element" on top.

Click on SAVE and save the table as local object.

Then, click on Technical settings button on top(Right corner) and provide the following data as shown below.

Click on SAVE and go back to the previous screen.
Clcik on Check button(cntrl+F2) ignore the warning messages click on Activate(Cntrl+F3)
Now the table successfully created. Click on Create entries path as shown below.

The following screen will appear Provide the data that you want to store in the table

click on SAVE

click on SAVE
To display the table contents Click on display path as shown below.
The following screen will appear. You can display records base on condition like empid = 1. Click on F8/execute button to display all entries

Table records will display as shown below.

You can create new entries or update existing entries or you can delete the entries using the below path
Select one record click on your option.

Select the radio button Database table and Provide the table name as shown below starting with 'Y' or 'Z'.
Click on Create button and provide the following details.
Provide the table fields as shown below. You can create the table with the pre-defined data types or you can use data elements provided by SAP. You can switch between Predefined/data elements using the button "predefined/ data element" on top.
Click on SAVE and save the table as local object.
Then, click on Technical settings button on top(Right corner) and provide the following data as shown below.
Click on SAVE and go back to the previous screen.
Clcik on Check button(cntrl+F2) ignore the warning messages click on Activate(Cntrl+F3)
Now the table successfully created. Click on Create entries path as shown below.
The following screen will appear Provide the data that you want to store in the table
click on SAVE
click on SAVE
To display the table contents Click on display path as shown below.
The following screen will appear. You can display records base on condition like empid = 1. Click on F8/execute button to display all entries
Table records will display as shown below.
You can create new entries or update existing entries or you can delete the entries using the below path
Select one record click on your option.
Admin- Admin
- Posts : 92
Join date : 2012-01-26 -

» Creating enhancement points in SAP Step-By-Step process
» Creation of Custom IDoc Step By Step process
» Creating data element step by step in SAP
» Creating domain step by step in SAP
» Finding BADI from ST05 in SAP Step By Step
» Creation of Custom IDoc Step By Step process
» Creating data element step by step in SAP
» Creating domain step by step in SAP
» Finding BADI from ST05 in SAP Step By Step
Page 1 of 1
Permissions in this forum:
You cannot reply to topics in this forum
» Difference between Type and Like
» How to handle table control fields in Module Pool program?
» Three tables inner join in SAP
» Creating table type in ABAP
» Creating user defined types and structures in ABAP
» Creating Dynamic Internal Table and Dynamic Field catalog in SAP-ABAP
» Copy Custom PF-Status from Standard program to Custom Program in ALV
» Calculate/find number of working days between two dates in SAP